It's been a busy few days away from this series prepping for the craft show that didn't happen (yet), having fun with my BFF and helping my three kiddoes through the ups-and-downs of the academic and social lives of the American teen (and pre-teen), but I'm back and ready to wrap it up. If you're just joining me you may want to read the first two posts: How-To & Sexy French Fold Binding, Part 2. So far, we've calculated how much fabric we need to make the binding using as little actual math as possible and we've made the continuous binding strip. Now it's time to attach it to the quilt.
In preparation for attaching the binding I always trim away the excess fabric and batting. I know a lot of quilters do this after machining the binding to the front of the quilt, but I have a few reasons for doing this first. If you've ever basted a quilt with needle and thread, or even pins, you know what a tedious task it can be. If, however, you've discovered the
joys of spray basting as I have, one of the downsides is that any batting that sticks out beyond the quilt top (and there should
always be some) will be sticky, tacky and feel like it spent a few hours under the high chair of snacking toddler. Not something I want to be handling while I'm quilting. The other downside I've experienced is what can happen if you are a little overzealous in your trimming with the binding attached. More than once I've been sitting happily hand stitching the binding to the back of the quilt and gotten to a corner only to discover that I had actually cut the binding. I won't share my verbal response to this here (especially the
second time it happened--once should have been enough), but suffice it to say this is not something I ever wish to repeat.
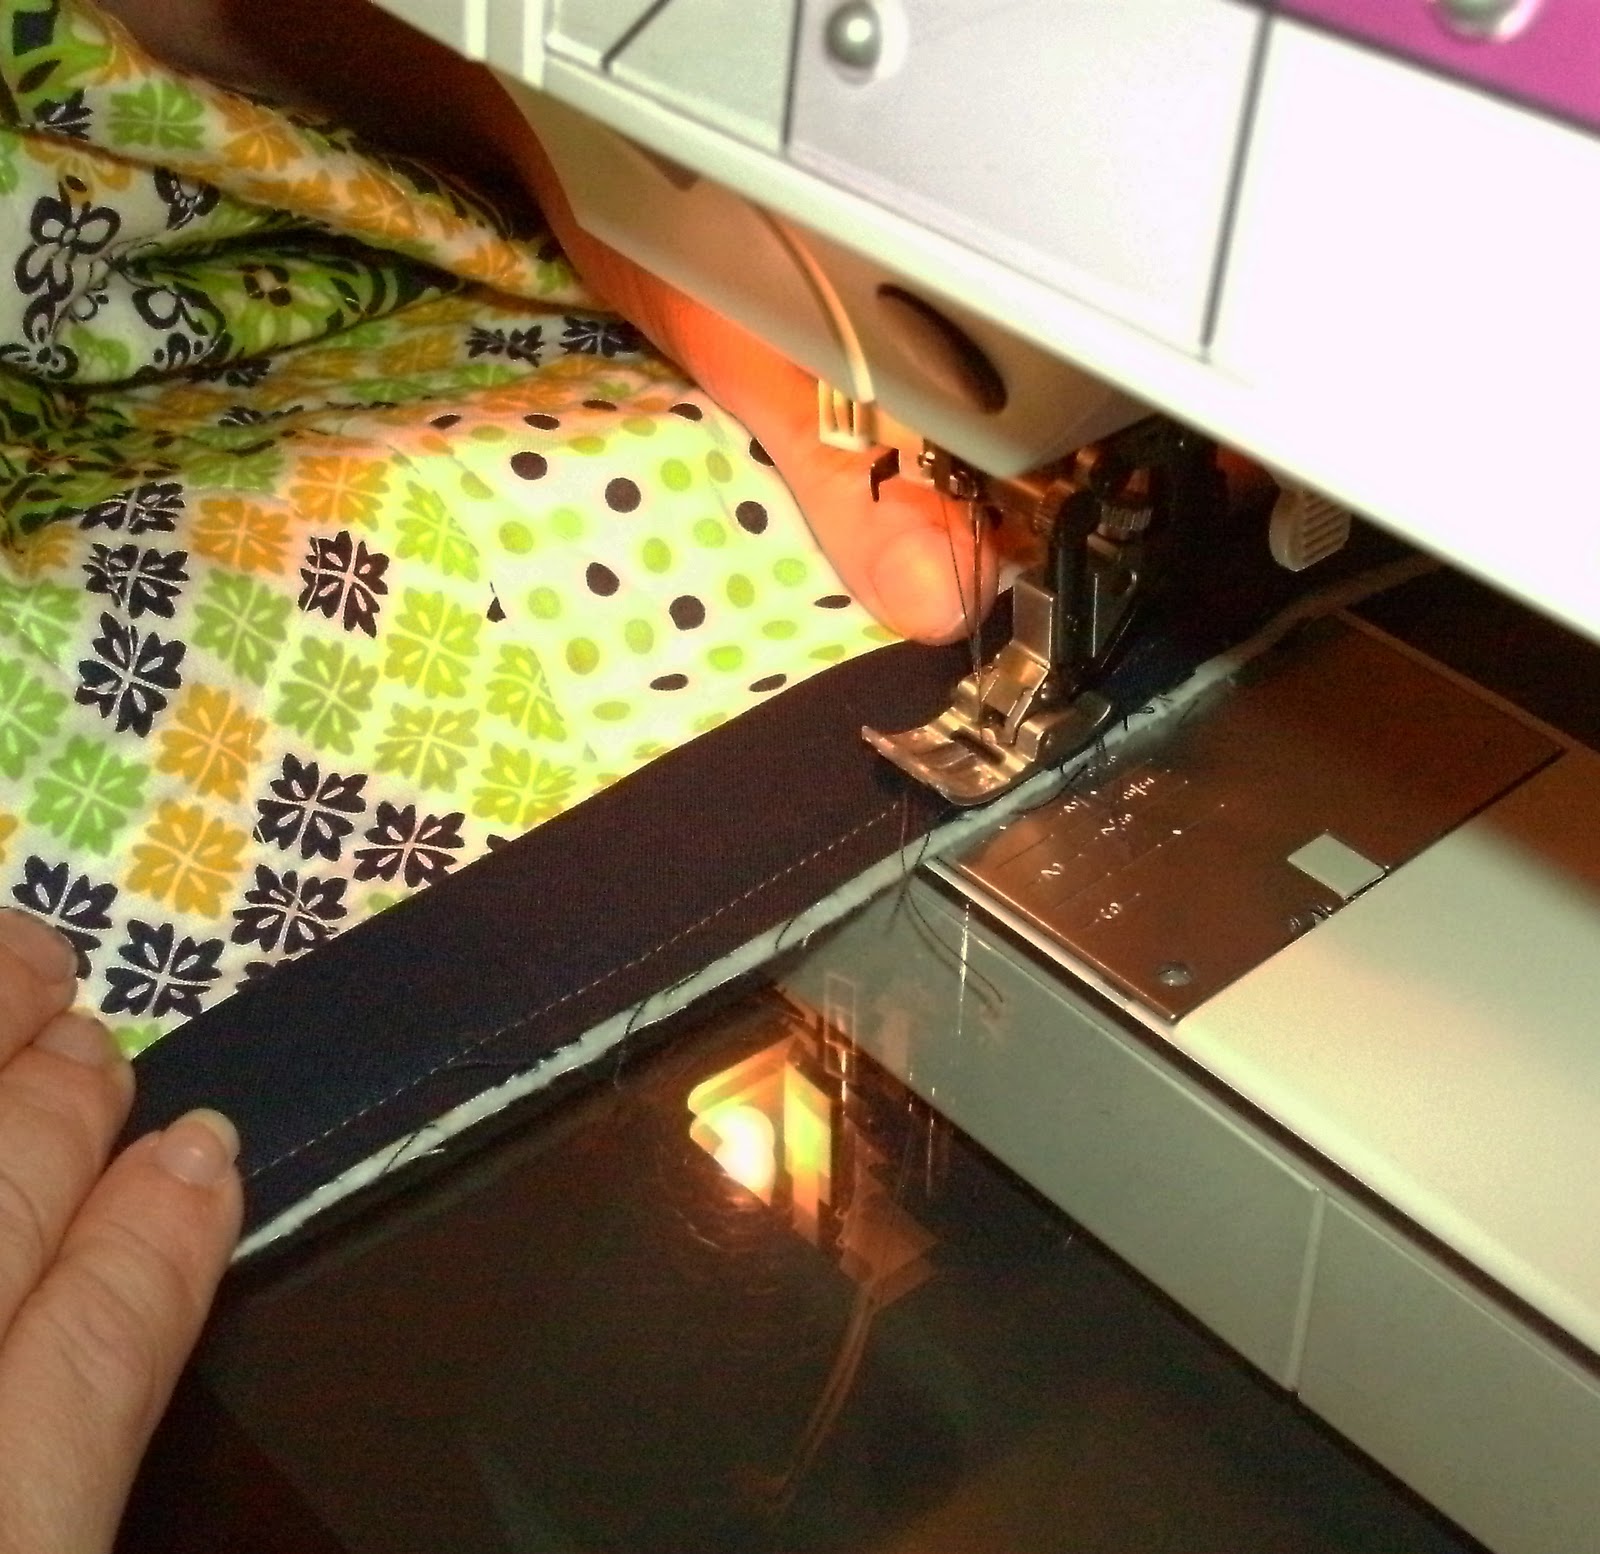
Now it's time to take your quilt and binding to the sewing machine. Remember when you ironed the first end of the binding over about an inch before pressing the whole thing in half? That's the end you start with. As you can see in the picture above, you starting stitching an inch or so from the end. This will be your ending point once you've made it around the quilt, so you don't need to back stitch to secure your thread. Simply align the raw edge of the folded binding with the raw edge of the quilt and stitch all the way around using an approximately 5/8" seam.
The only somewhat complicated part of attaching the binding is the corners. I will do my best to explain here, but please use the comments section below to ask questions if this is confusing! (And keep playing the Grace Potter selection I've added to my playlist--it might not help with the corners but it will probably make you feel better...)
When you are about a 1/4" from the corner of the quilt take 3 or 4 stitches in reverse, cut your threads and rotate the quilt so that the next side is ready to feed under the needle. Fold the binding straight up and away from you so that the raw edge of the quilt appears to continue straight into the raw edge of the binding as shown in the photo above.
Before beginning to stitch to again, fold the binding back down over itself with raw edges of quilt and binding aligned again.
Drop the needle down about one inch from the corner of the quilt (remember to use 5/8" seam here) and reverse stitch, stopping about 1/4" before the end of the quilt. Now start sewing as usual along the binding until you reach the next corner and repeat the process.
When you have made it all the way around the quilt and reached your starting point (hopefully without running out of binding!) you will cut the excess binding off, leaving enough to insert into the folded over binding that you began with that is not yet stitched down (see above).
Insert the end of the binding into the beginning piece. I find it's helpful to use a stiletto or closed scissors to slide inside the two pieces of binding to get them to fit smoothly together. (Please excuse the fuzziness of this photo. It was physically impossible for me to take this picture myself--believe me, I tried--and my photographer was anxious to get back to her AP Chem homework.)
Now continue sewing over both pieces of binding overlapping the stitches you started with by 4 or 5 stitches, reverse stitch to secure, and cut your threads.
All that's left now is a few hours of hand stitching (which I personally enjoy) the folded edge of the binding to the back of the quilt. If you have questions about that, leave me a comment below & I'd be happy to answer them.
Congratulations! You've made it all the way through this how-to! If you're still with me, there's a reward...Stop by Monday, 10/3 when I make a big announcement and kick off a GIVE AWAY to celebrate! And tune in later this week when I'll post a pic of the finished quilt from this tutorial, which will be available in my shop.


thanks for this, i have found myself more and more fascinated by quilters lately. it's such an intense and time consuming process. you create something beautiful but rarely get what the pieces are worth!
ReplyDeleteLike any art, it's a labor of love. Pricing the finished product certainly is tricky...
ReplyDelete