Showing posts with label how to. Show all posts

Monday, September 26, 2011

Sexy French Fold Binding, Part Trois (Finally!)

It's been a busy few days away from this series prepping for the craft show that didn't happen (yet), having fun with my BFF and helping my three kiddoes through the ups-and-downs of the academic and social lives of the American teen (and pre-teen), but I'm back and ready to wrap it up. If you're just joining me you may want to read the first two posts: How-To & Sexy French Fold Binding, Part 2. So far, we've calculated how much fabric we need to make the binding using as little actual math as possible and we've made the continuous binding strip. Now it's time to attach it to the quilt.

In preparation for attaching the binding I always trim away the excess fabric and batting. I know a lot of quilters do this after machining the binding to the front of the quilt, but I have a few reasons for doing this first. If you've ever basted a quilt with needle and thread, or even pins, you know what a tedious task it can be. If, however, you've discovered the joys of spray basting as I have, one of the downsides is that any batting that sticks out beyond the quilt top (and there should always be some) will be sticky, tacky and feel like it spent a few hours under the high chair of snacking toddler. Not something I want to be handling while I'm quilting. The other downside I've experienced is what can happen if you are a little overzealous in your trimming with the binding attached. More than once I've been sitting happily hand stitching the binding to the back of the quilt and gotten to a corner only to discover that I had actually cut the binding. I won't share my verbal response to this here (especially the second time it happened--once should have been enough), but suffice it to say this is not something I ever wish to repeat.
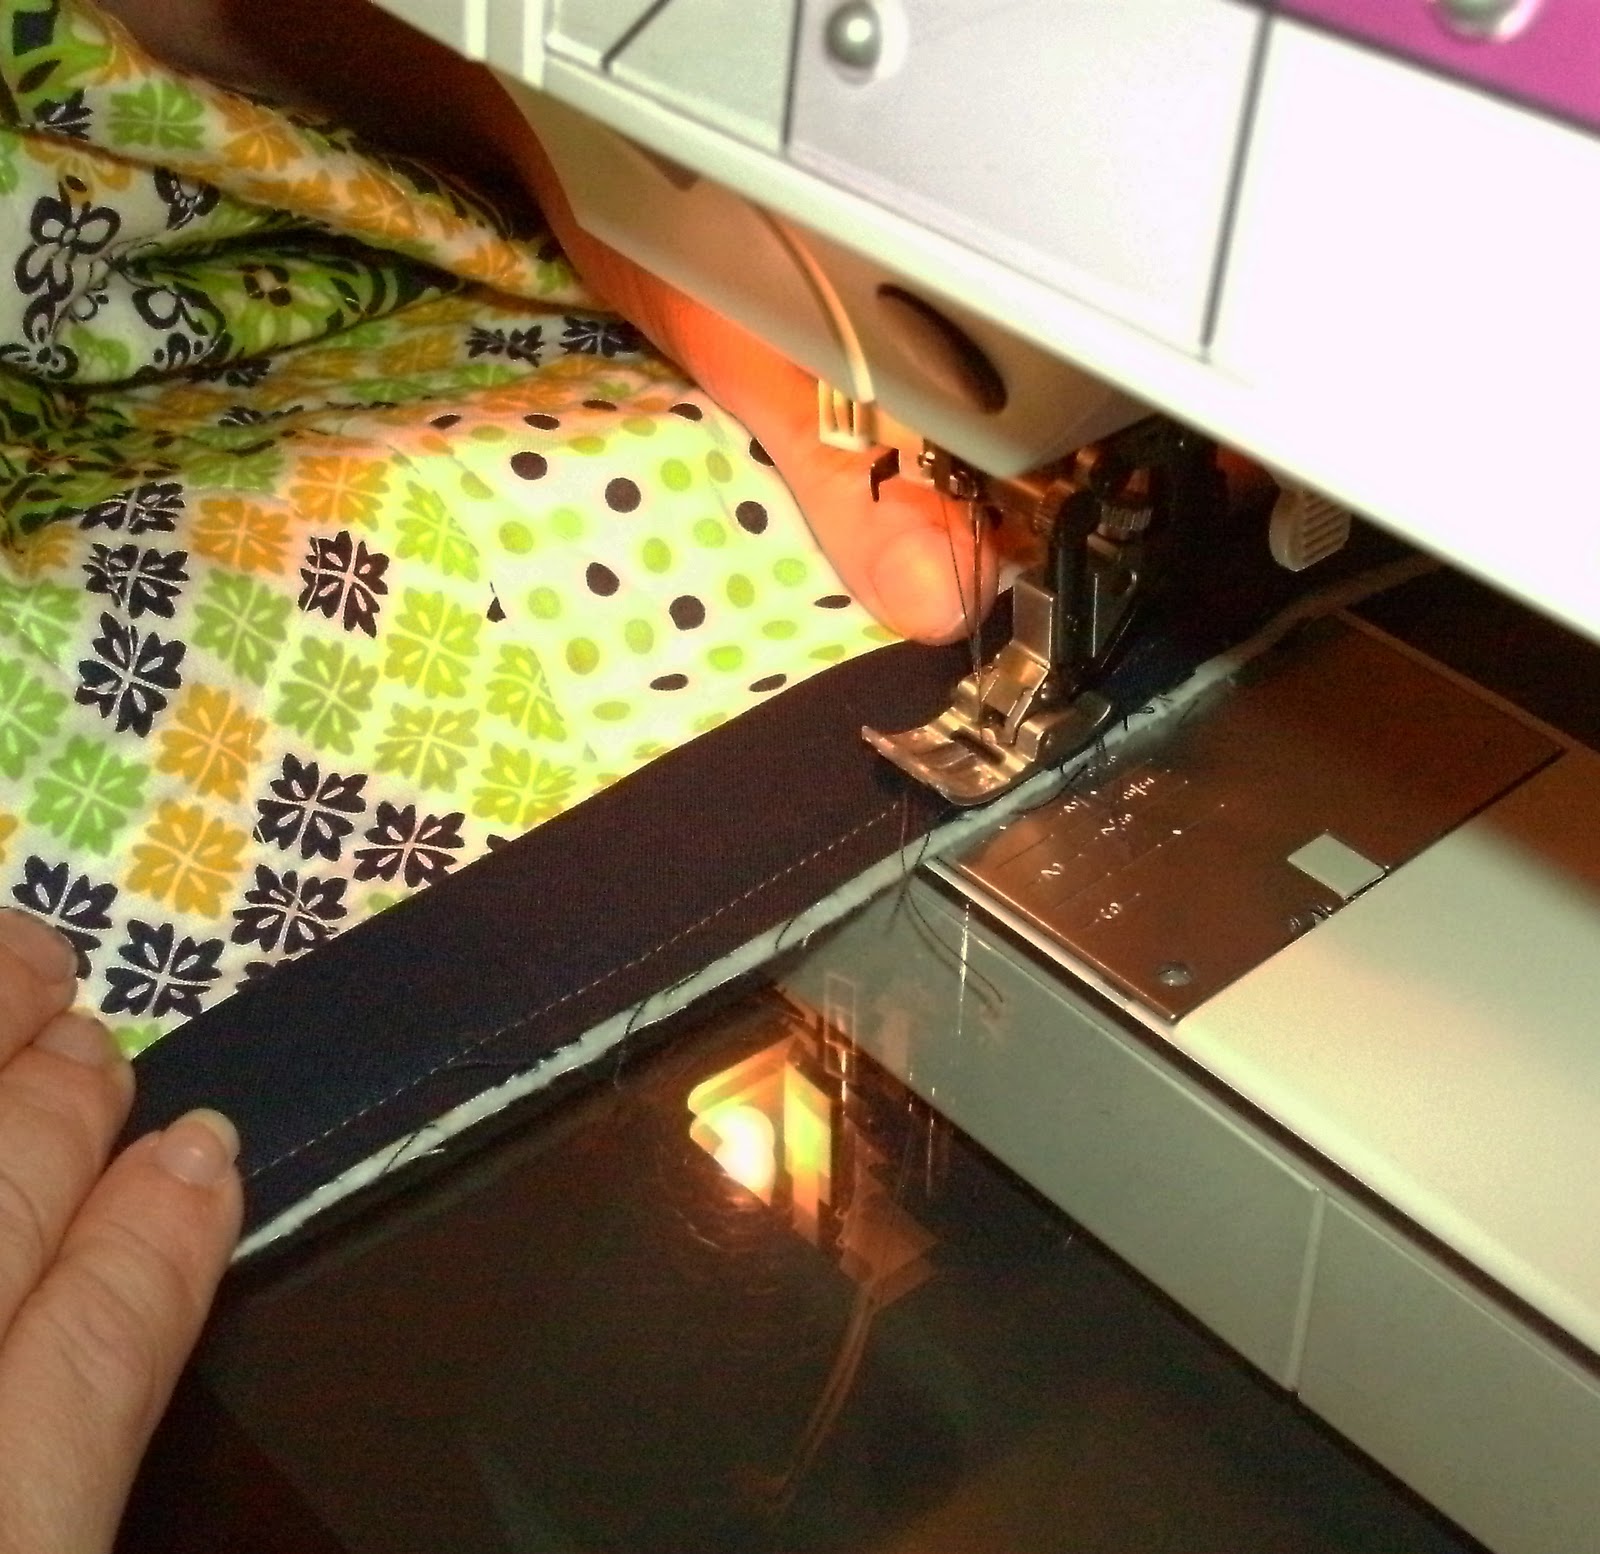
Now it's time to take your quilt and binding to the sewing machine. Remember when you ironed the first end of the binding over about an inch before pressing the whole thing in half? That's the end you start with. As you can see in the picture above, you starting stitching an inch or so from the end. This will be your ending point once you've made it around the quilt, so you don't need to back stitch to secure your thread. Simply align the raw edge of the folded binding with the raw edge of the quilt and stitch all the way around using an approximately 5/8" seam.

The only somewhat complicated part of attaching the binding is the corners. I will do my best to explain here, but please use the comments section below to ask questions if this is confusing! (And keep playing the Grace Potter selection I've added to my playlist--it might not help with the corners but it will probably make you feel better...)
When you are about a 1/4" from the corner of the quilt take 3 or 4 stitches in reverse, cut your threads and rotate the quilt so that the next side is ready to feed under the needle. Fold the binding straight up and away from you so that the raw edge of the quilt appears to continue straight into the raw edge of the binding as shown in the photo above.
Before beginning to stitch to again, fold the binding back down over itself with raw edges of quilt and binding aligned again.

Drop the needle down about one inch from the corner of the quilt (remember to use 5/8" seam here) and reverse stitch, stopping about 1/4" before the end of the quilt. Now start sewing as usual along the binding until you reach the next corner and repeat the process.

When you have made it all the way around the quilt and reached your starting point (hopefully without running out of binding!) you will cut the excess binding off, leaving enough to insert into the folded over binding that you began with that is not yet stitched down (see above).
Insert the end of the binding into the beginning piece. I find it's helpful to use a stiletto or closed scissors to slide inside the two pieces of binding to get them to fit smoothly together. (Please excuse the fuzziness of this photo. It was physically impossible for me to take this picture myself--believe me, I tried--and my photographer was anxious to get back to her AP Chem homework.)

Now continue sewing over both pieces of binding overlapping the stitches you started with by 4 or 5 stitches, reverse stitch to secure, and cut your threads.

All that's left now is a few hours of hand stitching (which I personally enjoy) the folded edge of the binding to the back of the quilt. If you have questions about that, leave me a comment below & I'd be happy to answer them.

Congratulations! You've made it all the way through this how-to! If you're still with me, there's a reward...Stop by Monday, 10/3 when I make a big announcement and kick off a GIVE AWAY to celebrate! And tune in later this week when I'll post a pic of the finished quilt from this tutorial, which will be available in my shop.


Thursday, September 22, 2011

Update

I thought the fact that I disappeared in the midst of a how to series deserved a quick explanation...As I mentioned in my Dear Blog post I have a craft show rapidly approaching--for those of you in my area, stop by Wenonah Park on Saturday before 4:00 to say hi! Couple the preparations for that with the happy fact that my BFF rolled into town Tuesday night (she's got the booth next to mine at the craft show)and we're playing working hard getting ready for the show. I had every intention of continuing to blog this week, but am facing reality and admitting that it's much more reality-based to tell myself (and you) that I will be back Monday. I'll finish up my how to series for those of you who are hanging on the edge of your seats, dedicate a post to the show with pics and all, and maybe throw another fun treasury at you.

So, until Monday...Cheers!

Tuesday, September 20, 2011

Sexy French Fold Binding, Part 2

Yesterday I began a How To series on making french fold binding to finish a quilt. It was all about how to calculate how much fabric you will need for the binding and is geared toward the mathematically challenge (aka, my soulmates). If you didn't get a chance to read it I recommend you head back to it before digging in to the following instructions.

How To Make Your Sexy French Fold Quilt Binding (everybody say: ooo-la-la)--with accompanying soundtrack by Grace Potter and the Nocturnals (see playlist in sidebar):

1) The first step to making any component of a quilt is to prewash and dry the fabric. It is important to minimize shrinkage and color bleed after affixing the binding to the quilt.

2) As always, you should iron your fabric before cutting it.

I have included this photo for those you who (like me)
 would not otherwise use this mysterious appliance.

After ironing it is important for some of us to rest because the next part involves numbers and I don't want you to wear out too quickly. Depending on the time of day you may want to pour a cup of coffee, tea or Cabernet Sauvignon...

3) Fold your fabric in half with the selvage edges together and lay out flat on your cutting mat. (See that little yellow thing with the shiny round end? That's a rotary cutter. It's VERY sharp, so if you chose the Cab for your little rest break you might want to try walking a straight line and reciting the alphabet backwards before proceeding.) Now cut the number of 2 1/2" strips that you calculated while reading my previous post.
4) The next step is mark your 2 1/2" strips in preparation for piecing them together. I could go all geometry on you here (well, actually I probably couldn't having barely passed the class about 30 years ago) but let's not make this harder than it needs to be. Quilting is usually a very precise art, but in this case it's ok to eyeball it. Put one strip on top of the other, right sides together with about 3/4" of excess fabric for each strip. Place a ruler on the top strip connecting the two points where the strips intersect as shown in the photo above, and draw a line. This will be your stitching line.

I probably didn't need to include this picture,
 but it came out pretty nice so I figured "What the heck!"
And who knows, maybe some of you need help envisioning stitching along the line you drew...

5) Now it's back to the cutting mat. If you took another Cab break, you should probably wait until tomorrow to do this...If you're still hanging with your coffee or tea, align the 1/4" mark of your ruler with the line you just stitched and cut off the excess fabric (leaving all fingers intact and attached).

6) Next you'll need to head to the ironing board and iron that seam open before attaching your next piece and repeating the first 5 steps until you run out of 2 1/2" strips. (I'm not sure what happened to the picture for this step, but I was only drinking water when I did this, HONEST!) It's important to me mention that you need to make sure you continue adding strips with the right sides together. This may seem pretty obvious but if you look at the fabric I'm using you'll notice that there's no difference between the right and wrong side. I have gotten to the final pressing of the strip and discovered that I had seams on BOTH sides of my binding (enter the handy-dandy seam ripper).
7) Once you have all your strips joined together with all the seams on the same side it's back to the ironing board where you will fold over about 1" of one end of the strip and press with hot iron (being careful to first remove your fingers). This will be where you start sewing the binding to the quilt.

8)The next step is to work your way down the entire length of the seemingly endless strip folding in half lengthwise and pressing it as you go. When you are done, you will have a long strip of about 1 1/4" width with one folded edge and one rough edge.
Don't worry if you don't have as many freckles as I do. I'm pretty sure it will still work, although I've never tried this without the freckles so I'm not making any guarantees...

That's it for today. Come back tomorrow when I show you how to attach the binding to the quilt.

Cheers!
Nancy